as Guide for Optimal
Digital Exposure
Nominally correct highlight exposure in a digital file occurs at the point where the brightest textured highlights in a scene are reproduced correctly, white with texture, and any more exposure would result in a loss of texture.
It is very easy to nail your exposures at that exact point by the simple expedient of including a white terry washcloth or towel in your test exposures and looking at the camera playback warning to detect clipping. When the the warning is enabled it will black-out any areas in the photo which are over-exposed. The exposure below was adjusted using the warning to keep the brightest highlights on the towel, a stand-in for the subject I was preparing to shoot, just under the point of clipping. When the texture is retained and any more exposure would obliterate it the file is correctly exposed.
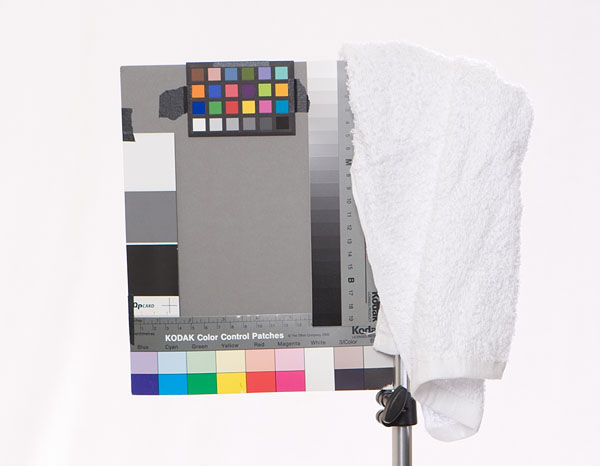

It takes some side-by-side comparison of the camera playback with the same RAW files seen on the computer to corollate the warning in the camera to the point where detail is lost in the RAW file. That is why a towel with texture rather than a white card is used. With the towel it is easy to see when overexposure starts to erase the subtle highlight detail.
Getting the highlights correctly exposed is only 1/2 of the exposure equation. When the highlights are exposed optimally the shadows fall wherever the range of the sensor puts them. In many cases outdoors the scene range will exceed the range of the sensor and some detail visible by eye will be lost in the photo.
Getting the most out of a digital camera distills down to exposing the file so the highlight detail is just below the point where the detail would be lost with any more exposure. Where the shadow detail will disappear will vary depending on the camera sensor range. If the scene you are photographing exceeds that range there are two solutions:
1) Add flash: Adding flash will effectively reduce the range of the scene so it fits the range of the camera.
2) Bracket and Blend: A typical outdoor scene will exceed the range of most cameras by about three f/stops. Place the camera on a tripod and shoot two exposures: one normal for the highlight and a second overexposed by 3 stops to record the detail which is lost in the first. Change exposure using shutter speed not aperture so there is no change in depth of field between the two shots. In Photoshop copy and paste the second file over the first and add a black mask. Erase the mask in the areas where more shadow detail is needed.
Holistic Concepts for Lighting
and Digital Photography
This tutorial is copyrighted by © Charles E. Gardner. It may be reproduced for personal use, and referenced by link, but please to not copy and post it to your site.
You can contact me at: Chuck Gardner
For other tutorials see the Tutorial Table of Contents