White Towel Exposure Method
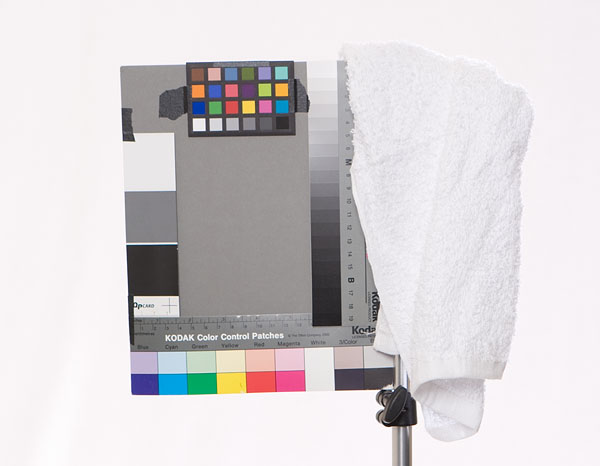
WHY A WHITE TOWEL?
In an digital capture there is very little margin for error when exposing the highlights. Slight under-exposure can be corrected in the RAW editor but if the highlight texture is obliterated during capture there is no way to bring it back in post processing. Post processing can make blown highlights darker, but the detail will be lost forever.
Every subject, even dark ones, have critical highlight detail. The illusion of 3D in a photograph is create with contrast between highlights and shadows. On both dark or light object the subtle transition areas around specular highlights create important clues to shape which add a sense of realism when preserved in the photograph. Skin tones, captured with the RGB digital recording process become overexposed first in the red channel causing the highlights to look flat and yellowish. All of these subtleties are impossible to detect by eye when shooting. That's where the white towel enters the picture: literally. The white towel is a proxy, large enough to see in the playback, for all the more subtle and hidden highlights too small to detect in the playback. The tiny loops of of terry cloth towel are an ideal gauge for when over-exposure threatens highlight detail. If the detail is lost in the towel it is an indication it is being lost in the subtle highlight transitions and the red channel in the skin.USING THE OVEREXPOSURE WARNING IN THE PLAYBACK
The best measure of exposure isn't a meter it is the last shot taken. A meter can't account for variables such as lens flare, or for that matter read the mind of the photographer and know what in a complex scene needs to be exposed optimally. The most useful feedback the camera provides comes from the "idiot light", the warning which blacks out areas of the playback which are over-exposed (clipping). Put a white towel in the scene where optimal exposure is needed in the highlights and you'd would need to be an idiot not to notice it was over-exposed in the clipping. The towel, combined with the over-exposure warning turns every one of the 900,000+ pixels in the playback screen on the back of the camera into a spot metering zone!
CHANGING THE PARADIGM OF METERING
With a hand held incident meter a photographer desiring correct exposure at f/8 for sufficient depth-of-field in a portrait would shuttle from subject to take a reading, to light to adjust power. Most photographers will start with the key light, then adjust fill to taste. The problem with that approach is that adding fill also adds light to the highlights, changing the exposure. Arriving at the desired ratio and correctly exposed highlights can be a bit like a dog chasing its tail.
That runaround can be eliminated completely by the simple expedient of starting with just the fill light on. Like building a house, the fill is the foundation of the lighting pattern. The playback of the camera allows the effect of the fill to be seen in the last shot taken. Staring with the fill and raising it to the point where detail is seen in the darkest areas lays the foundation for technically correct exposure: detail reproduced accurately over the entire tonal scale.
The ideal location for fill is over the camera where it can illuminate everything the camera sees.
If the fill is moved to the side it will create shadows. Where there is a fill shadow there will be no shadow detail there.
RATIOS BY THE NUMBERS USING THE TOWEL
It is also possible to set lighting ratios "by the numbers" using the white towel and the camera. Set the camera aperture to the desired intensity for the light being measured when raise its power until the towel in seen to clip in the playback.
For example, lets say we want the fill light at f/5.6 and the key light one stop brighter than fill at f/8:- Set camera aperture to f/5.6
- Turn on the fill light by itself
- Raise intensity of fill until the towel starts to clip
- turn off fill light
- Set camera aperture to f/8
- Turn on the Key Light. Raise it's intensity of until the towel starts to clip
- To adjust for correct exposure, turn both lights on and adjust aperture by about -1/3 stop until clipping in the towel disappears.
IF YOU ALREADY HAVE AN INCIDENT METER
The Catch-22 of meters is that the meter ISO sensitivity in most cases doesn't match the true sensitivity of the camera when set on the same value. Meter and camera may be set at ISO 100, but a meter reading taken with the correct procedure of pointing the dome at the camera from subject position does not produce a correct exposure. The solution to that problem is to enter a compensation factor into the meter so its reading matches the camera aperture which does produce the correct exposure. How to determine when the exposure is correct in the highlights? Put a white towel in the scene. Meter it, then bracket above and below the reading in 1/3 stop increments with camera aperture. Look at the files and see which reproduces the towel correctly. The difference, if any, from the meter reading is the compensation factor which must be entering in the incident meter. See the meter manual for instructions for setting exposure compensation.
Holistic Concepts for Lighting
and Digital Photography
This tutorial is copyrighted by © Charles E. Gardner.
It may be reproduced for personal use, and referenced by link, but please to not copy and post it to your site.
You can contact me at: Chuck Gardner
For other tutorials see the Tutorial Table of Contents